
Planning a haul-out involves tight schedules and demanding physical labor. To ensure your boat's underwater hull remains sound and protected, proper execution of bottom prep and drivetrain maintenance is critical.
Based on practical yard experience, this technical guide outlines the essential steps for servicing a saildrive, preparing the hull for antifouling, and repairing gelcoat chips.
1. Saildrive Maintenance & Shaft Seal Replacement
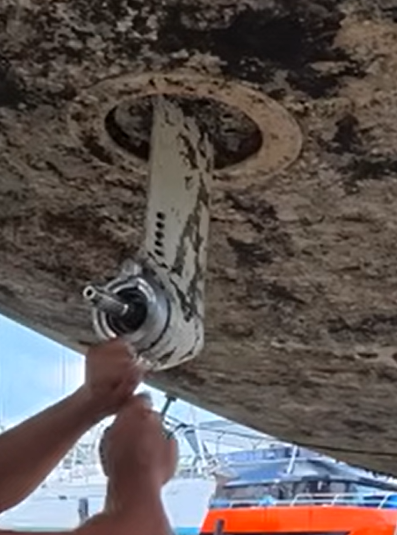
Servicing the underwater components of your saildrive is a top priority during any haul-out. Neglecting these steps can lead to severe gear damage or catastrophic galvanic corrosion.
Inspecting Oil and Replacing Seals
Check for Water Emulsion: When draining the saildrive oil, check its consistency. Milky oil indicates water intrusion, meaning the shaft seals have failed. If the oil is clear, the seals did their job, but they should still be replaced as a preventative measure.
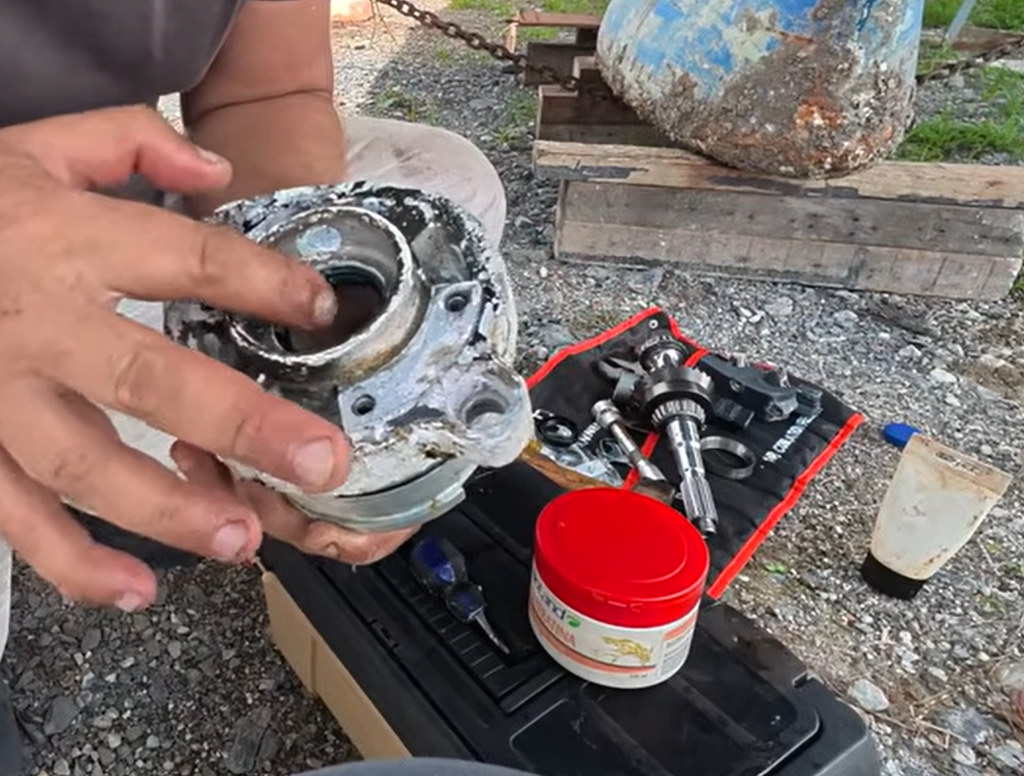
Propeller Shaft Seals Installation: Saildrives typically use two rubber lip seals.
Pro Tip: Pack marine grease into the cavity where the stainless steel spring sits. Even stainless springs can rust over time in saltwater; grease adds an extra layer of protection.
- Orientation: Install the outer seal so that the lip blocks water from entering, and the inner seal so that it keeps the gear oil contained.
- Seating: Use a matching socket tool to gently and evenly tap the new seals into the housing. Ensure there are no gaps or misalignment.
- Calibration Shims: Keep track of any thin calibration shims behind the housing. They maintain the correct shaft-to-gear clearance and must go back exactly as they came out.
Sacrificial Anodes and Galvanic Corrosion
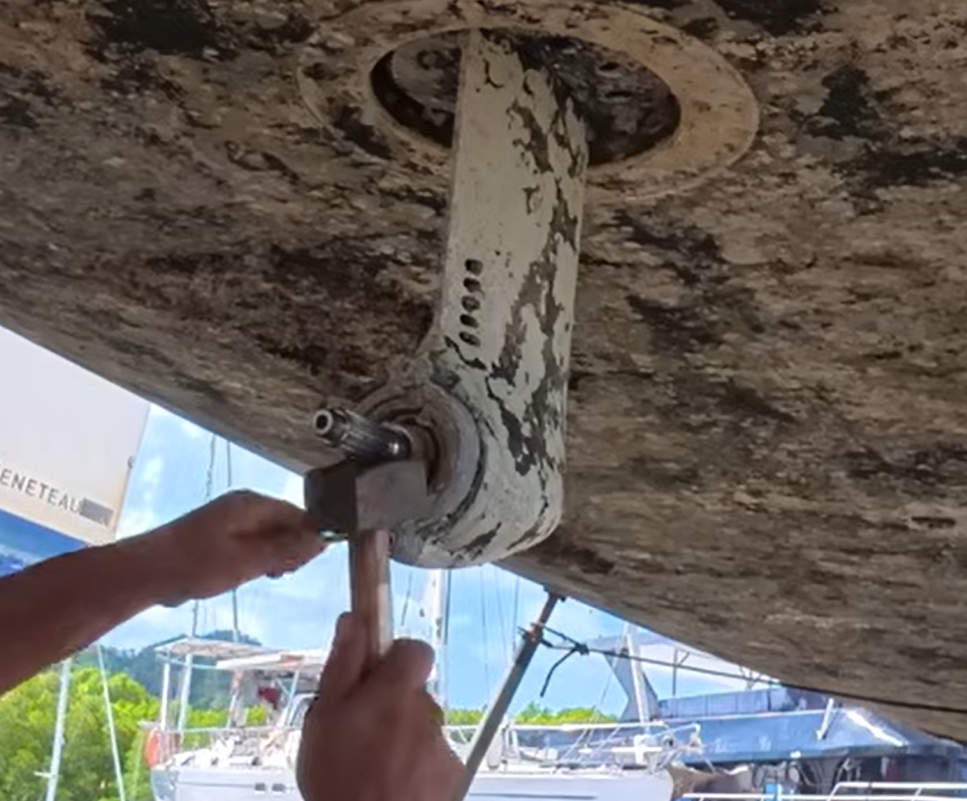
Check Electrical Contact: A heavily corroded anode means it is working. However, if you notice pitting or corrosion on the aluminum saildrive leg around the mounting bolts, it indicates poor electrical contact between the anode and the leg.
The Fix: Thoroughly clean and sand the mounting surfaces down to bare metal before installing the new anode. Use marine grease on mounting bolts that are protected by an external cover to make future removal easier.
2. Hull Preparation and Antifouling Scraping
Removing old antifouling paint is a tedious but necessary task to prevent paint buildup, cracking, and hydrodynamic drag. The peeling bottom paint visible around the saildrive leg in the photos above is exactly the condition that makes controlled scraping and masking essential before repainting.
Choosing the Right Tools
Variable Speed is Mandatory: When using an angle grinder or orbital sander to remove old bottom paint, always use a tool with variable speed control. Running a grinder at maximum RPM will instantly bite into the fiberglass, causing deep gouges that require extensive repair. Lower speeds provide control and safety.
Protecting the Gelcoat
Waterline Masking: Apply heavy-duty masking tape exactly along the waterline or the edge of the antifouling paint. This tape is not just for a clean paint line — it acts as a physical shield. If your sander or grinder slips, it will hit the tape rather than scratching the exposed gelcoat.
Avoid Cheap Tape: Never use low-quality white masking tape. It bakes under the sun, tears into small pieces, and leaves behind stubborn adhesive residue. Opt for high-quality blue painter's tape designed for marine environments.
Washdown: Once grinding is complete, thoroughly wash the entire hull with fresh water to remove all toxic composite dust before applying new primer.
3. DIY Gelcoat Chip and Gouge Repair
The bow of a yacht is highly susceptible to chips and gouges from anchors, dock lines, or minor debris impacts. Leaving fiberglass exposed to saltwater allows moisture to wick into the laminate, potentially leading to osmosis.
Surface Preparation
- Grind Clean: Use a Dremel or a small grinding wheel to clean out the damaged crater. Remove any loose or fractured gelcoat.
- De-dust and Degrease: Wash the area, let it dry, and thoroughly wipe it down with pure acetone to remove contaminants and residual oils.
Applying the Filler
Use a premium two-component marine epoxy or polyester filler paste, blended strictly according to the manufacturer's ratio (e.g., 1:2 catalyst to base).
- Overfill the scratch slightly, as some marine pastes shrink slightly as they cure.
- Allow the filler to cure completely — preferably longer than the minimum instructions specify to ensure full chemical hardening.
- Sand the patch flush using progressively finer grit sandpaper until it matches the hull contour, preparing it for primer or gelcoat finishing.
Summary Checklist for Your Next Haul-Out
- Drain saildrive oil and check for water contamination
- Replace shaft seals back-to-back, packing the springs with marine grease
- Clean anode contact surfaces to bare metal to prevent leg corrosion
- Use a variable-speed grinder for bottom paint removal to protect the laminate
- Use premium blue tape to protect topside gelcoat from sanding slips
- Clean gelcoat gouges with acetone before applying two-part filler